Add a New Centre
Add a new centre and related information, such as demographics, billing, clinical, messaging settings and other centre settings.
Before you begin
Permissions:
- Update Centre Settings
About this task
Procedure
To add a new centre:
-
Select
 user >
  Settings.
-
In the
 Settings window, select .
-
In the Centre Management window, click
 Add New.
The Add Centre window is displayed. Complete the centre information on each tab:
Add New.
The Add Centre window is displayed. Complete the centre information on each tab: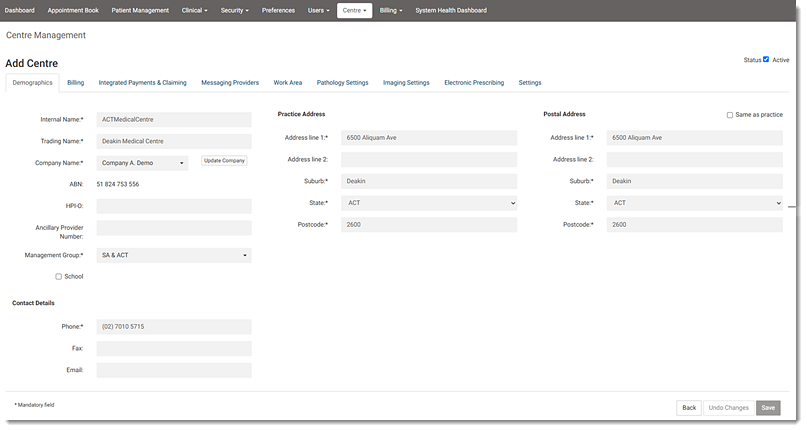 Important:Fields marked with an
*Asterisk are mandatory.-
On the Demographics tab, enter the Internal Name,
Trading Name, Company Name,
ABN, HPI-O, Ancillary
Provider Number, Management Group,
School ID, and the Practice's Address, Postal
Address, and Contact Details:
- In the Company Name field:
- To add a new company:
- From the Company Name field, select Add new company.
- In the Create Company window, enter the company name and ABN.
- Click Save. A new company name is added to the list.
- To update the company's details:
- Click Update Company. The Update
Company panel is displayed.

- If required, in the Company section, update the company name and ABN and click Update Company.
- In the Company Details section:
- To add details for a new company, provide a company's contact details.
- To edit the existing company's details, update the required information.
- Click Update Company Details.
- Click Update Company. The Update
Company panel is displayed.
- To add a new company:
- In the Company Name field:
-
On the Work Area tab, click
 Add and from the Work Area Name list, select the
required work area for your centre and set fee schedules:
Add and from the Work Area Name list, select the
required work area for your centre and set fee schedules: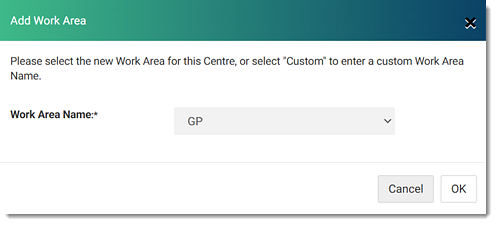
- To add more work areas, repeat the process.
- To make a work area active, set Active.
- To add a custom work area:
- From the Work Area Name field, select Custom.
- In the Custom Work Area field, enter the work area you want.
- Click OK.
-
On the Demographics tab, enter the Internal Name,
Trading Name, Company Name,
ABN, HPI-O, Ancillary
Provider Number, Management Group,
School ID, and the Practice's Address, Postal
Address, and Contact Details:
Results
What to do next
 Edit. For more information, see Edit a Centre.