Edit a Centre
Update the required centres and their associated information such as demographics, pathology settings, work area, imaging settings and other details.
Before you begin
Permissions:
- Update Centre Settings
About this task
Procedure
To edit a centre:
-
Select
 user >
  Settings.
-
In the
 Settings window, select .
-
In the field, enter the name of the centre whose details you want to update. A
list of matching centres is displayed as you enter the name; add more characters to refine
the list.
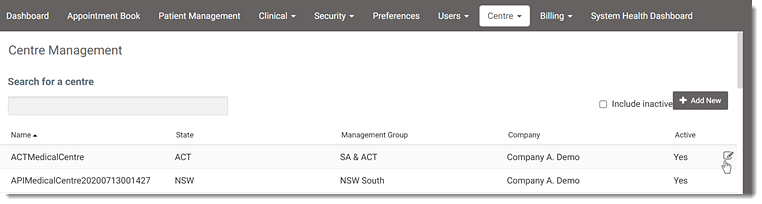
Tip:- To include inactive centres in the list, set Include Inactive. Inactive centres are displayed at the bottom of the list.
- To change the sort order, click the required column header.
-
Hover your mouse over the required centre and click
 Edit.
Edit.
-
In the Edit Centre window, locate and update the required details
on any of the following tabs:
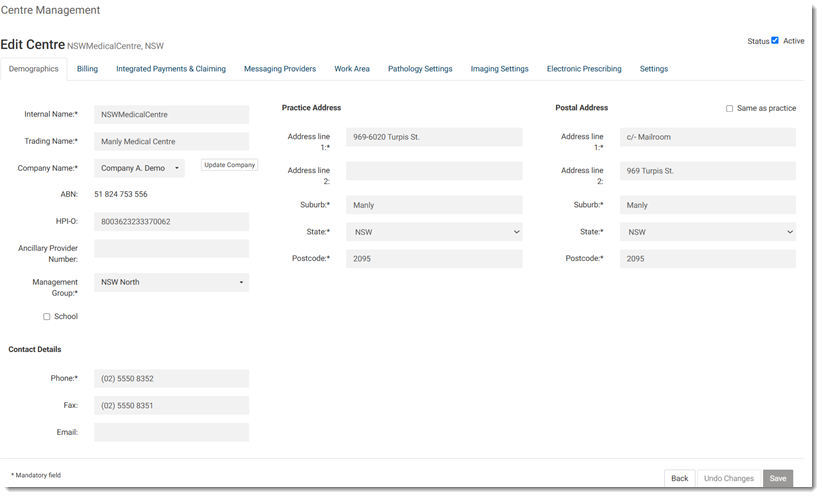
- In the Status field, change the status of the centre at the top right of the window if required.
- On the Demographics tab, edit the
required centre's demographics information, such as Internal
Name, Trading Name, Company
Name, ABN, HPI-O,
Ancillary Provider Number, Management
Group, School ID, Practice's Address, Postal Address,
and Contact Details:
- To edit the company's details, select panel, update the required information. For more information, see Update Company.
- On the Billing tab, edit the required billing details, such as centre's bank account details, Invoice Prefix, LSPN, Location ID, Refund limit, Default billing type, default billing items for different scenarios and your Modified Monash Category for billing incentive items. For more information, see Configure Centre Billing.
- On the Integrated Payments & Claiming tab, use toggle to either enable or disable the integrated payments or update an exiting terminal information. For more information, see Tyro Integration.
- On the Messaging Providers tab, manage communication with pathology, imaging, and Secure Message Delivery (SMD) providers. For more information about configuring messaging services, see:
- On the Work Area tab, set the required work areas to active or
inactive and update the corresponding visit rates for private, pre-employment and
workers compensation visit types.Tip:To add a new work area, select
 Add > Add Work Area > Work Area Name. For more information, see Add Work
Area.
Add > Add Work Area > Work Area Name. For more information, see Add Work
Area. - On the Pathology Settings tab, manage the pathology providers list for Pathology Requests and change the default provider.
- On the Imaging Settings tab, manage the imaging providers list for imaging requests and change the default provider.
- On the Electronic Prescribing tab, change the ePrescribing timeout, after which Helix tries to send the prescription again or reverts to a printed script. For more information about electronic prescribing in Helix, see Electronic Transfer of Prescriptions.
- On the Settings tab, update your time zone.