Generate a Recall by Searching for Patients
Create a recall after searching for and locating the patient's record.
Before you begin
Permissions:
To create a recall from the - View Clinical Reports
 Patient Reports, you must first search for the patient records
in the
Patient Reports, you must first search for the patient records
in the  Patient Reports section. For more information, see Patient Reports.
About this task
Patient Reports window.Procedure
To create a recall:
-
In the Patient Reports search results, create a recall:
- For a single patient, hover your mouse over the required patient and in the
Actions column, click
 Recall.
 - For multiple patients, select the required patient records and click
Add selected to recalls.
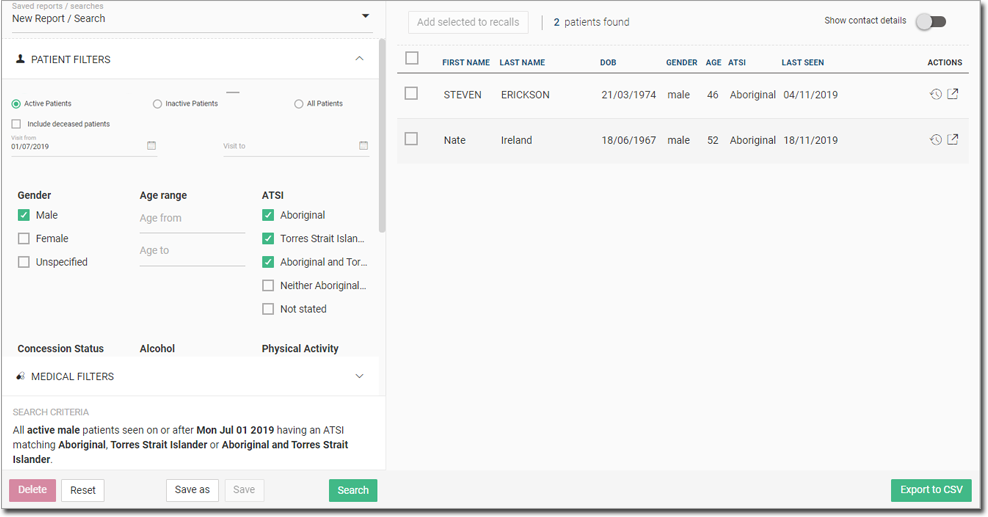
You are redirected to the create recall panel.Note:- Recalls cannot be generated for deceased patients. However, if you want to generate a report that includes deceased patients, in the Patient Filters section, set Include Deceased Patients before searching.
- To include patients' contact details in the search results, toggle Show contact details to on.
- For a single patient, hover your mouse over the required patient and in the
Actions column, click
-
From the Centre list, select the centre for which you want
to create a recall for the patient. Helix defaults to the currently
logged-in centre.
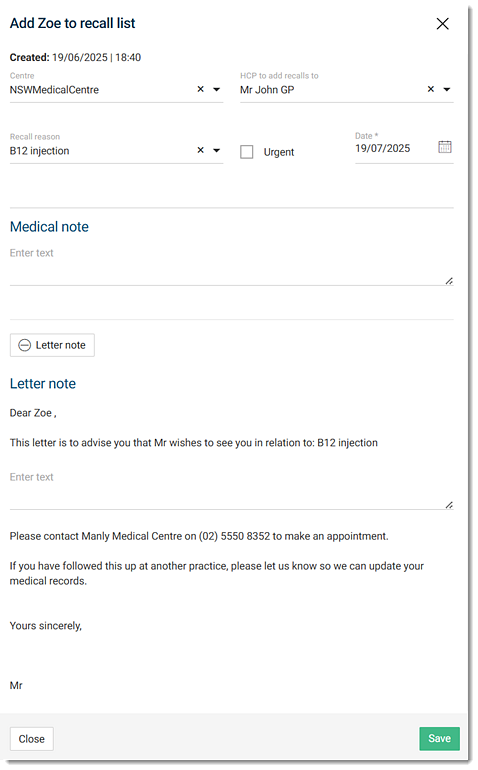
Tip:The settings you select are applied to the recall for all of the selected patients. -
By default, recalls are created for the user currently logged in. However, recalls
can be assigned to any Health Care Professional with practitioner-related
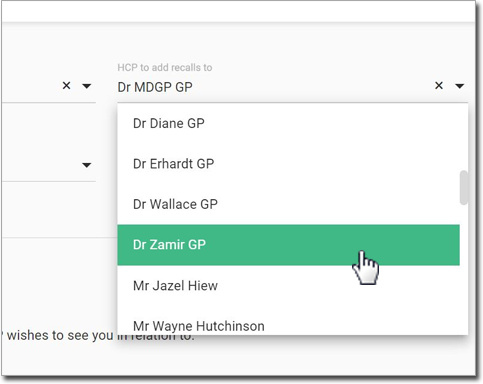
permissions. To assign the recall to another practitioner, from the HCP to
add recalls to list, select the preferred practitioner.
-
From the Recall type list, select a reason for the
recall.
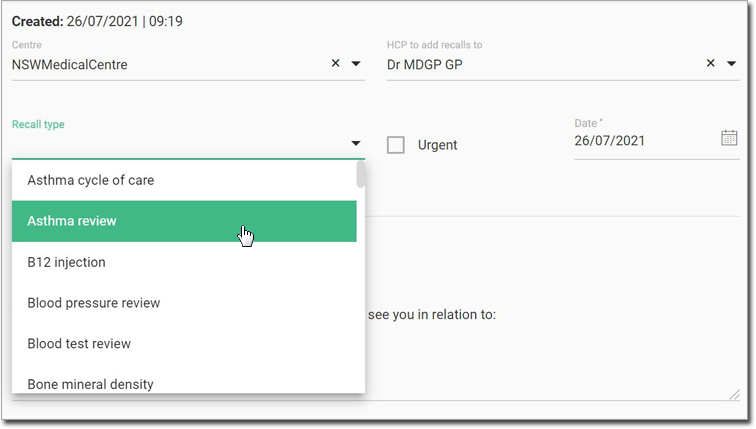
-
If required, to notify the patient immediately, set Urgent.
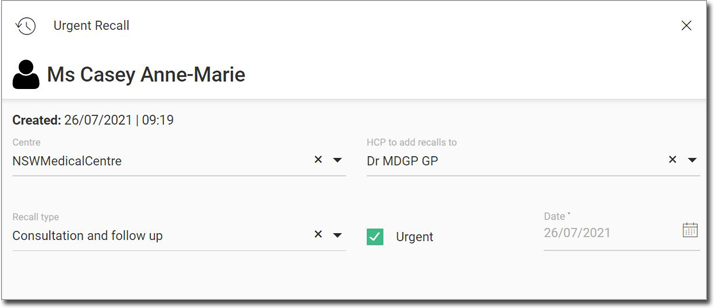
- The title changes to read Urgent Recall.
- The recall date defaults to the current date and cannot be modified.
-
If it is not an urgent recall, from the Date calendar, set
an interval or a specific date on which the patient is to be notified of the recall.

Tip:Default recall intervals depend on the type of recall reason selected and can be customised for your health centre. -
Depending on the recall type:
- In the Medical Note field, enter any required information.
- Click
 Letter note and complete a recall letter.
Results
What to do next
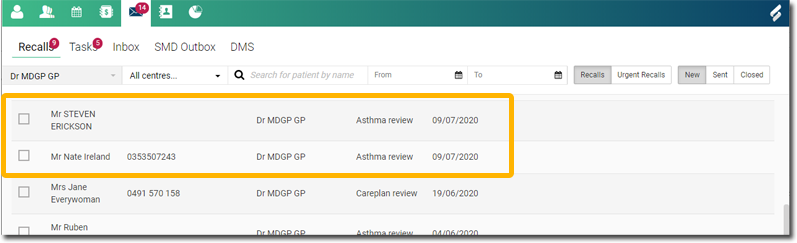
To view the recalls, select  Message Centre > Recalls. For more information, see Recalls in the Message Centre.