Enable SMS Appointment Updates
Enable sending SMS messages from the appointment book.
Before you begin
Permissions:
- Update Centre Settings
- Set up and send patient SMS
About this task
Procedure
- Select .
- Select .
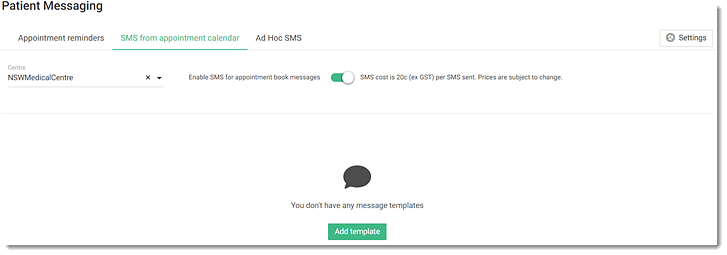
- Select the SMS from appointment calendar tab.
- From the Centre list, select the centre for which you want to enable SMS.
-
To create a new template for the centre, click Add
template.

- In the Template name field, enter a name for the template.
-
In the message field, enter your message. To personalise the SMS, click +
Add field and insert fields that are substituted for patient or other
information from the patient records.
Tip:Limit the template to fewer than 160 characters to ensure that the SMS message is sent as a single SMS to reduce costs. An estimate of the number of characters is displayed below the message. The actual character count may vary, depending on the data inserted for any fields.
- Click Save.
- Toggle Enable SMS for appointment book messages on.
Results
SMS messaging for appointments is activated for the selected centre.
What to do next
If required, to create an additional template
for the centre, click ![]() Template and repeat the steps.
Template and repeat the steps.
To delete an existing template, hover your
mouse over a required template, click ![]() Delete.
Delete.
To send an SMS message from the appointment book, click ![]() SMS patients. For more information, see Send SMS appointment updates.
SMS patients. For more information, see Send SMS appointment updates.
If required, to edit a sender name, select . For more information, see SMS Sender Name.