Inbox
Use the Message Centre Inbox to view patients' investigation results and health summaries that were delivered electronically to your health centre.
Before you begin
Permissions:
- View Results
- Action Results
About this task
Procedure
To access the inbox messages:
-
From the main menu, select
 Message Centre.
-
In the
 Message Centre window, select the
Inbox tab.
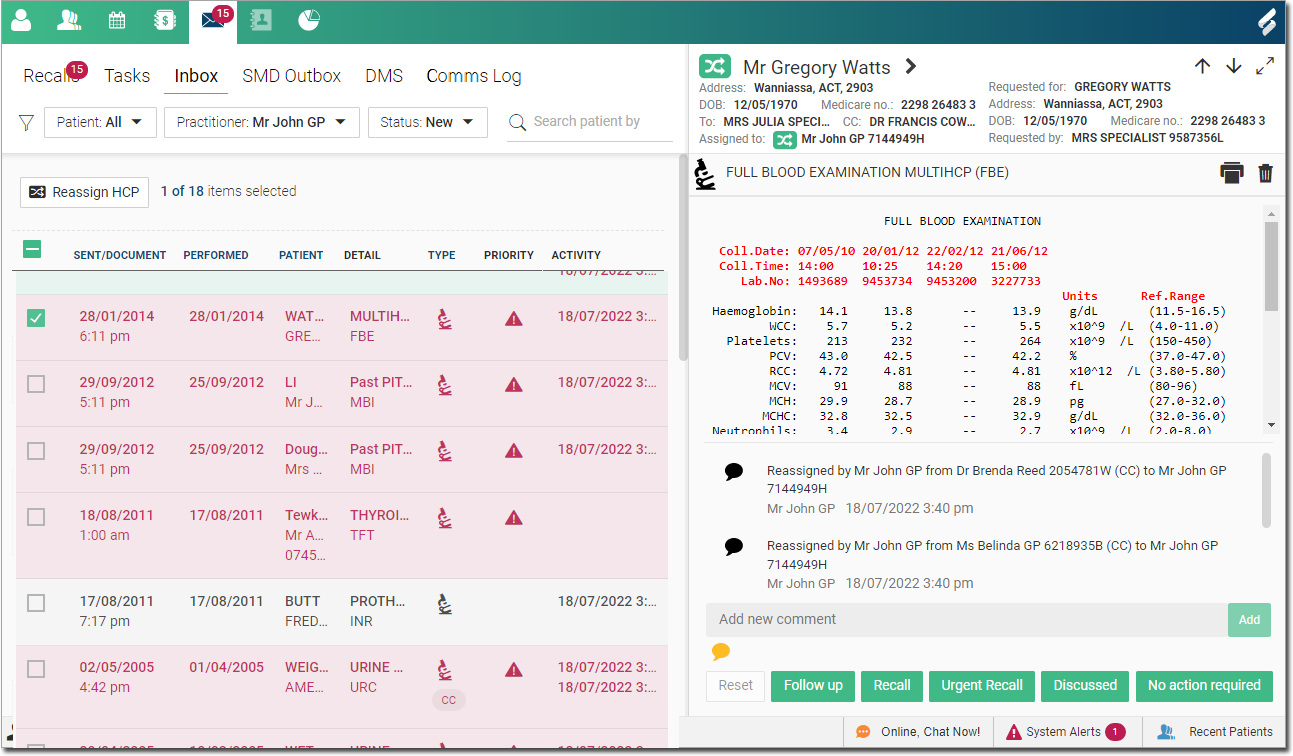
The Inbox contains the following information about a result:- Sent/Document - displays the date that the result was sent from the providers or the document date in the Document Management System (DMS).
- Performed - the date when the test was performed.
- Patient - displays the name of the patient and their contact number.
- Detail - displays a brief description of the result or name of the test report or document. For example, 2nd Trimester Ultrasound Jennifer Smith.
- Type - displays an icon for the document
type. For example,
 Pathology report,
  radiology report and so on. For more information about
identifying the document types, see Document types table.
 - Priority - displays the severity of the
result.Important:Abnormal results are displayed in a faded red and an
 Abnormal icon is displayed in the
Priority field.
 - Activity - records the date when an action is performed on an inbox item, such as, assigned and assignee details added, or followed up.
-
By default, the messages are sorted by sent date most recent to oldest. If
required, to sort the results by other criteria in ascending or descending
order, select any of the following column headers:
- Sent/Document
- Performed
- Patient
- Type
-
If required, to filter the messages, from the header, select:
- Patient list - filter the Inbox to show either items where there is a matching patient or items with no matching patient record.
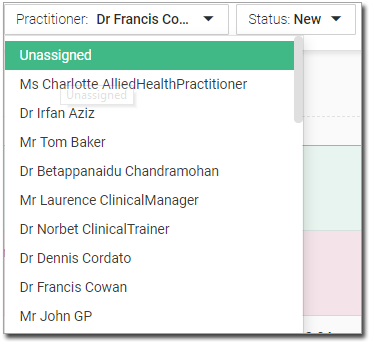
- Practitioner list - filter the
Inbox to show items that are associated with
any practitioner, a specific practitioner, or are not associated with a
practitioner.To view unassigned messages, select Unassigned from the list.
 Tip:If the result item is not assigned to any of the practitioners, a recipient's name is displayed with a report name in the Detail field.
 - Status list - the Inbox displays results that have a status of New and are assigned to the practitioner who is currently logged in. Filter the results by status. For more information about other statuses, see Inbox status table.
 Search patient by name - filter the messages by
patient's name.
-
If required, to reassign an HCP to one or more inbox items:
-
Select the required item or select all items and then click
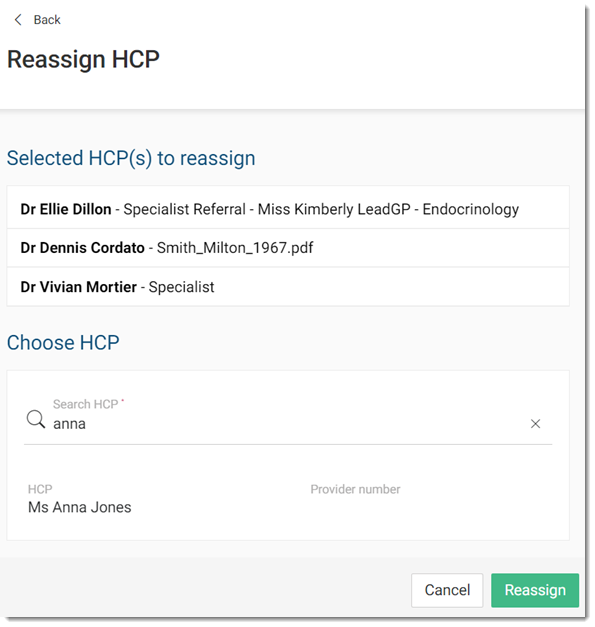
 Reassign HCP at the top. You are redirected to
the Reassign HCP panel.
-
In the Selected HCP(s) to reassign section, review
the list of selected HCPs you want to reassign if required.

- In the Search HCP field, start typing an HCP's name and select the required HCP from the list of matching results.
- Click Reassign.
-
Select the required item or select all items and then click
-
To perform any action (for example, Follow up or
Recall) on a specific message, complete the following
steps:
Results
Example
