Add a User
Add anyone who needs to access Helix as a user.
Before you begin
Permissions:
- Update Users
About this task
When adding a user record, you will complete the following information:
- Record the user's basic details such as their name.
- Indicate if they are a healthcare provider. They will be required to supply their provider details.
- Indicate which centres they work at. A user can work at multiple locations.
- For each centre, indicate what work areas they are members of.
- Add the user to a group.Tip:If you create a user and do not specify group membership, the user is assigned to the default group.
Use this field information to help complete this task.
Procedure
To add a new user:
-
Select
 user >
  Settings.
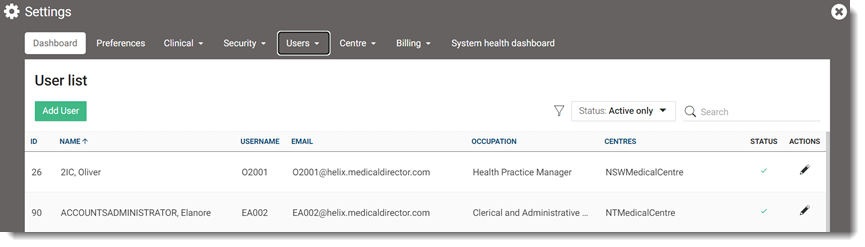
- In the Settings
window, select . The User list window is
displayed.
-
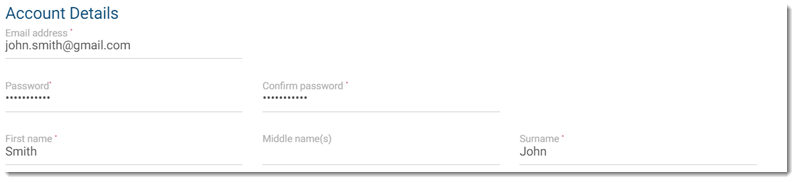
In the Account Details section, provide account details for
this user. For details about the information required for each field, see Account
details.
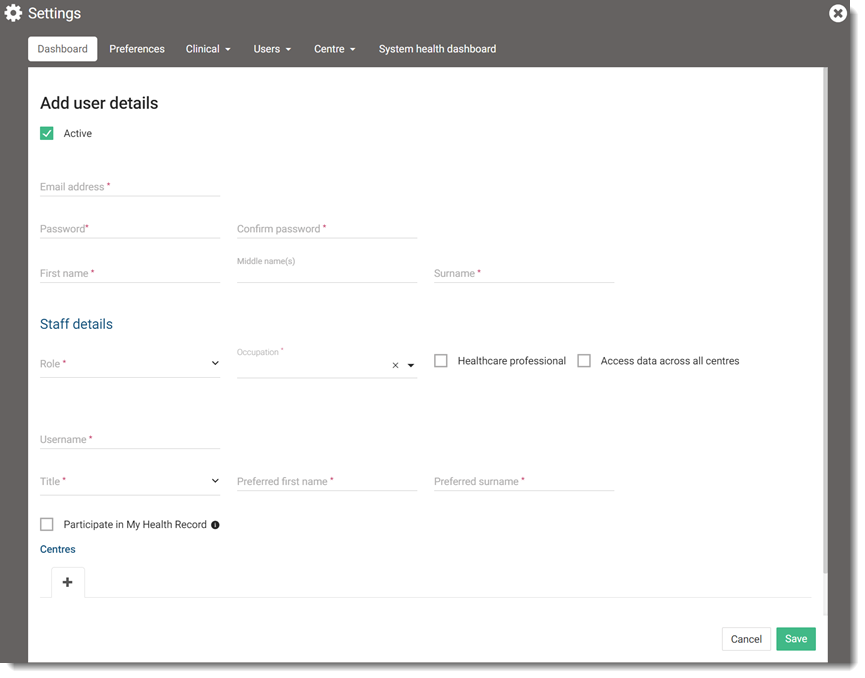
-
In the User Details section, provide user login details for
this role and set whether this user is a healthcare professional. For details about
the information required for each field, see User
Details.
-
To add the practices, health centres or organisations at which the user works:
- In the Centres section, click
 Add.
Add. - From the Centre list, select a centre and click OK.
- Complete the required information. For details about the information required
for each field, see Centre
details.
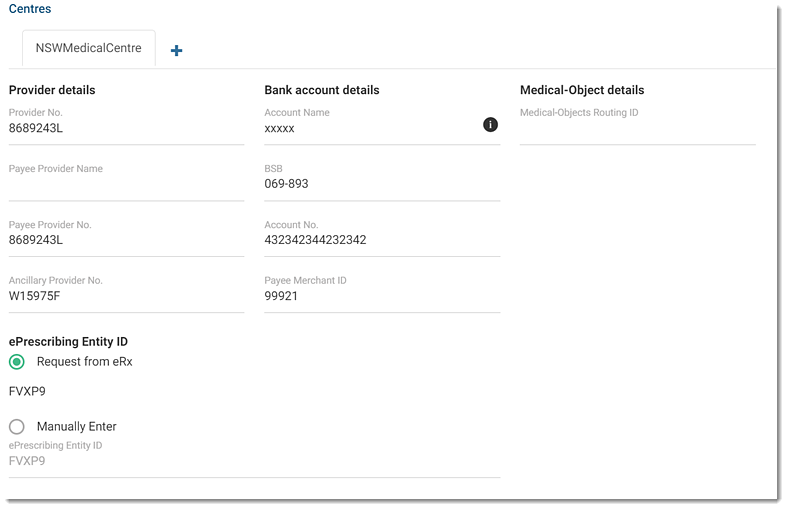
- In the Provider details section, enter the provider details. For more information, see Provider details.
- If required, to include an HCP's bank details in their invoices, provide
an HCP's bank account details in the Bank account
details section. For more information, see Bank
account details.Tip:If the banking details are not required for the provider, clear all fields in the Bank account details section.
- In the Medical-Object details section, provide the medical-object details for your centre. For more information, see Medical-Object details.
Tip:If this user is a healthcare provider who has opted in to ePrescribing, retrieve or enter their ePrescribing Entity ID. For more information, see ePrescibing Entity ID. - Repeat for each centre at which the user works.
- In the Centres section, click
-
If required, add work areas for each centre. Use the work areas to define separate
default item numbers and fee schedules.
- In the Work Areas section, click Add.
- From the Work Area list, select a work area and click
OK.
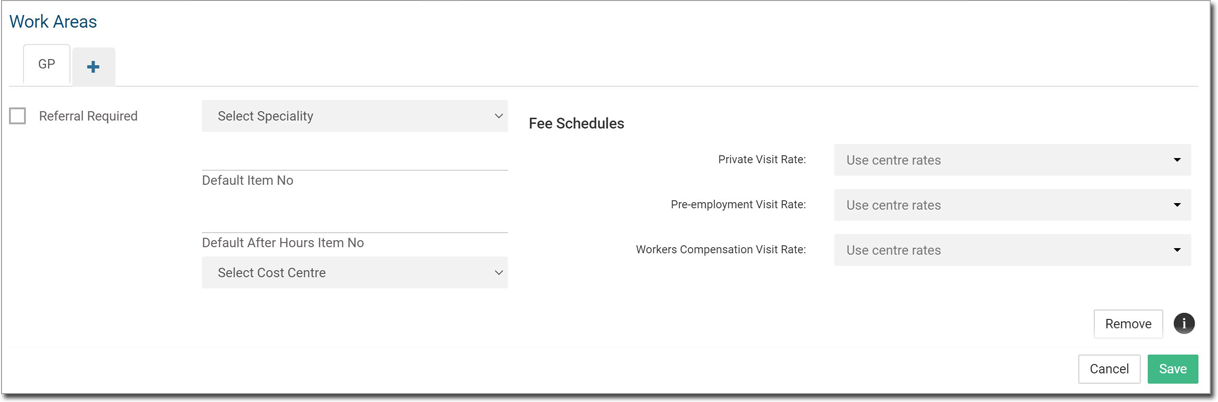
- Complete as much information about this user's work area as possible. For details about the information required for each field, see Work area details.
- Add extra work areas for this user if required.
- In the Work Areas section, click
Results
What to do next
After you have added a user, add the user to a role or assign permissions.