Medicare Bulk Billing & AoB
A Medicare bulk-bill visit is created with all required pre-assignment or post-assignment details.
Before you begin
About this task
Procedure
-
From the
 Patient Search, enter and select a patient.
-
In the floating navigation bar, click
 Visit.
-
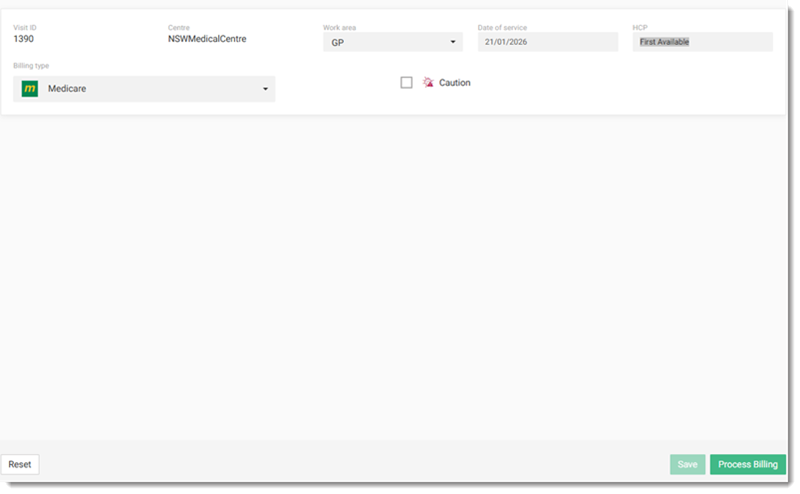
Create a Medicare bulk bill visit as described in Create a Visit.
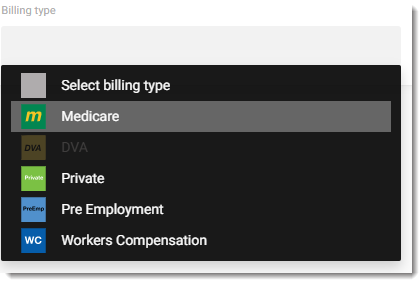
Tip:In the Visit panel, select Medicare from the Billing type list.
-
To create a Medicare bulk bill, click Process billing at
the bottom-right.
-
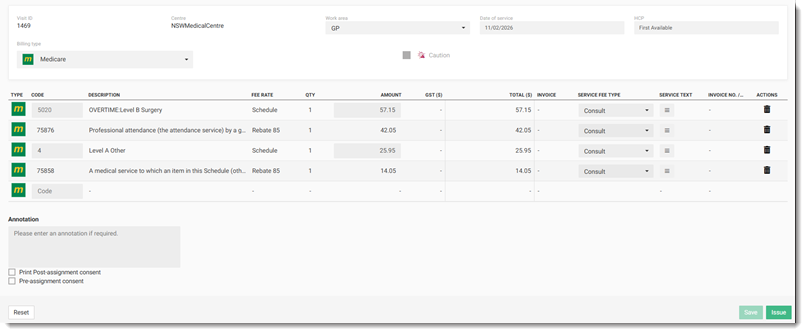
In the Medicare bulk bill list, add service items and enter an annotation if
required in the Annotation field. For more information,
refer to Initiate Billing.
-
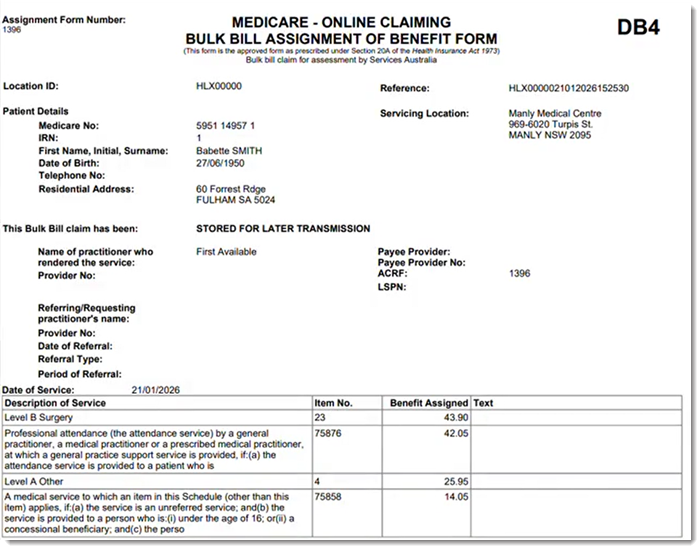
To print the DB4 - Post assignment form, select
Print Post-assignment consent then select
Yes or No from the
Is the assignor the patient? list.

- Yes is selected by default for residents aged 16 years or older.
- No is selected by default for residents under 16 years.
- These default selections can be changed as required, regardless of the ages.
Note:Is the assignor the patient? is displayed only when either Print Post-assignment consent or Pre-assignment consent is selected. The DB4 - Post assignment form is available for printing only when Print Post-assignment consent is selected. If Print Post-assignment consent is unselected, you can still issue the bills without printing the post-assignment consent form, but not all the post-assignment details are captured. -
Select Pre-assignment consent then select
Yes or No from the
Is the assignor the patient? list, and fill in the
Agreement date .

Note:The Agreement date is displayed when Pre-assignment consent is selected. The date is the current system date of the medical centre's timezone and cannot be a date in the future.
Results
The DB4 - Post assignment form is generated in a new tab for the patient and can also be accessed and printed from the Transaction History tab. In the Transaction History screen, The Is Assignor the patient? column is automatically set for the selection made earlier in the Medicare bulk bill visit. If no assignment details were captured during the Medicare bulk bill visit, the selection is automatically set based on the resident's age, using the default age-based logic. For more information, refer to Patient Transaction History.
The Assignment of Benefits report is added to the Financial Reports tab with all the summaries for selected visits, providers, or patients for financial review and reporting. For more information, refer to Generate Financial Reports.